 ACU
ACUStep-by-Step Guide for Setting Up Companies in Acumatica
For businesses expanding and managing more than one company, setting up a new company in Acumatica ERP is an important step. This includes configuring a new legal company, creating a test environment for demo purposes, or onboarding new divisions. With the help of the Acumatica tenant-based structure, this becomes easy to operate.
⚡ Key Insight: Acumatica's tenant-based structure allows you to manage multiple companies within a single instance, making it ideal for organizations with complex legal entities or multi-division operations.
Accessing the Companies Screen
To create a new company in Acumatica, follow the below process:
- Log in into your Acumatica Instance
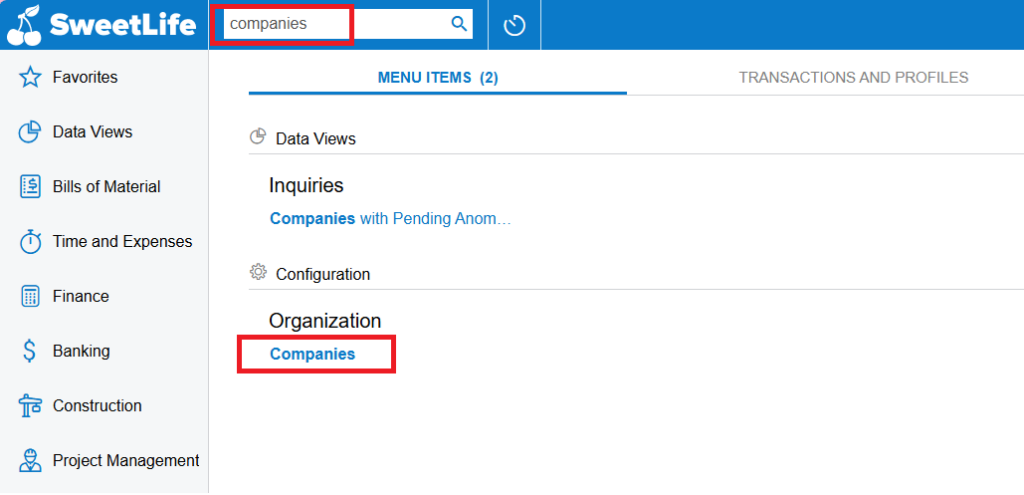
- Navigate to Configuration > Organization > Companies
- Alternatively, you can simply search "Companies" on the Global search bar
Source: Greytrix – Acumatica Blog
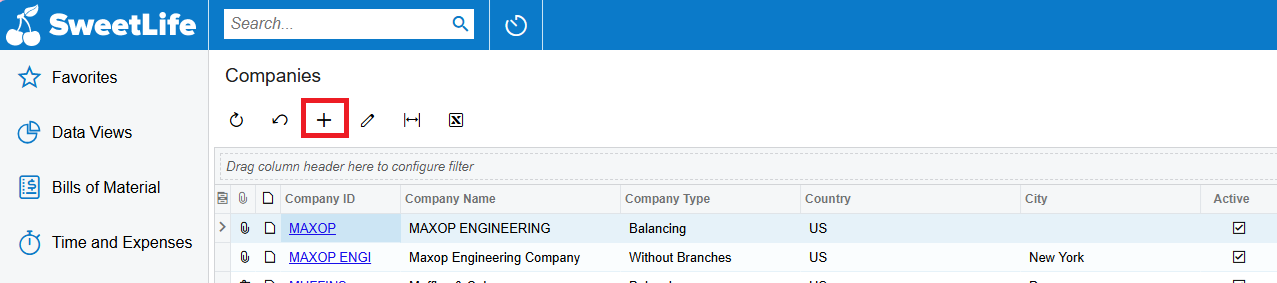
You will find the list of companies present in the given dataset or tenant if exists. Click on the "+" button on the form toolbar to create and configure a new company.
Source: Greytrix – Acumatica Blog
Company Form Overview
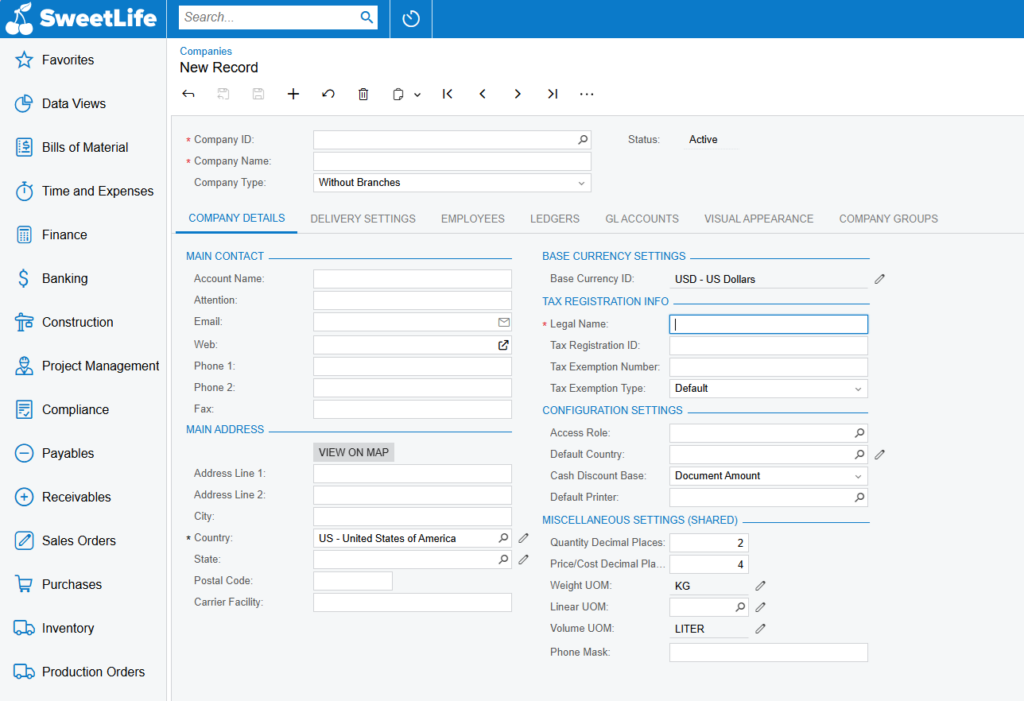
Below Company form will open where you can create and manage legal entities in Acumatica. This includes setting up company information, base currency, tax registration details, configuration preferences, and unit-of-measure settings.
1. Company Details Tab
This is the main tab where basic company information is entered. It includes:
- Company ID and Name – Unique identifier and display name
- Legal and tax information – Registration numbers, tax IDs
- Main contact and address – Primary business location
- Base currency settings – Functional currency for the company
- Configuration settings – Access roles, default printer, decimal place preferences
- Miscellaneous settings – Units of measure, phone mask
Source: Greytrix – Acumatica Blog
2. Delivery Settings Tab
Used to define default shipping preferences for the company. This may include:
- Delivery Contact – Default contact for shipments
- Delivery Address – Default shipping address
- Shipping Instructions – Default shipping notes
This helps streamline logistics and outbound delivery operations.
3. Employees Tab
Lists employees assigned to the company. This is especially important if the company handles payroll, approvals, or time and expense tracking. You can link users as employees for access and operational roles.
4. Ledgers Tab
Allows you to associate the company with specific ledgers — such as Actual, Reporting, Budget, or Statistical ledgers. This is crucial for financial reporting and separating transactions at the ledger level.
💡 Pro Tip: Setting up ledgers correctly is critical for financial reporting. Ensure you associate the appropriate ledger types for your reporting requirements.
5. GL Accounts Tab
In this tab, you define or review default General Ledger accounts related to the company, such as:
- Sales accounts
- Expense accounts
- Discount accounts
- Currency gain/loss account
6. Visual Appearance Tab
This tab allows you to customize the look and feel of the company's interface. You can upload a logo or adjust themes specific to this tenant or branch, which helps distinguish between multiple companies visually.
7. Company Groups Tab
This tab is used to assign the company to one or more company groups. These groupings are used for consolidation, reporting, security, or intercompany transactions. These are useful in multi-company environments.
Completing the Company Setup
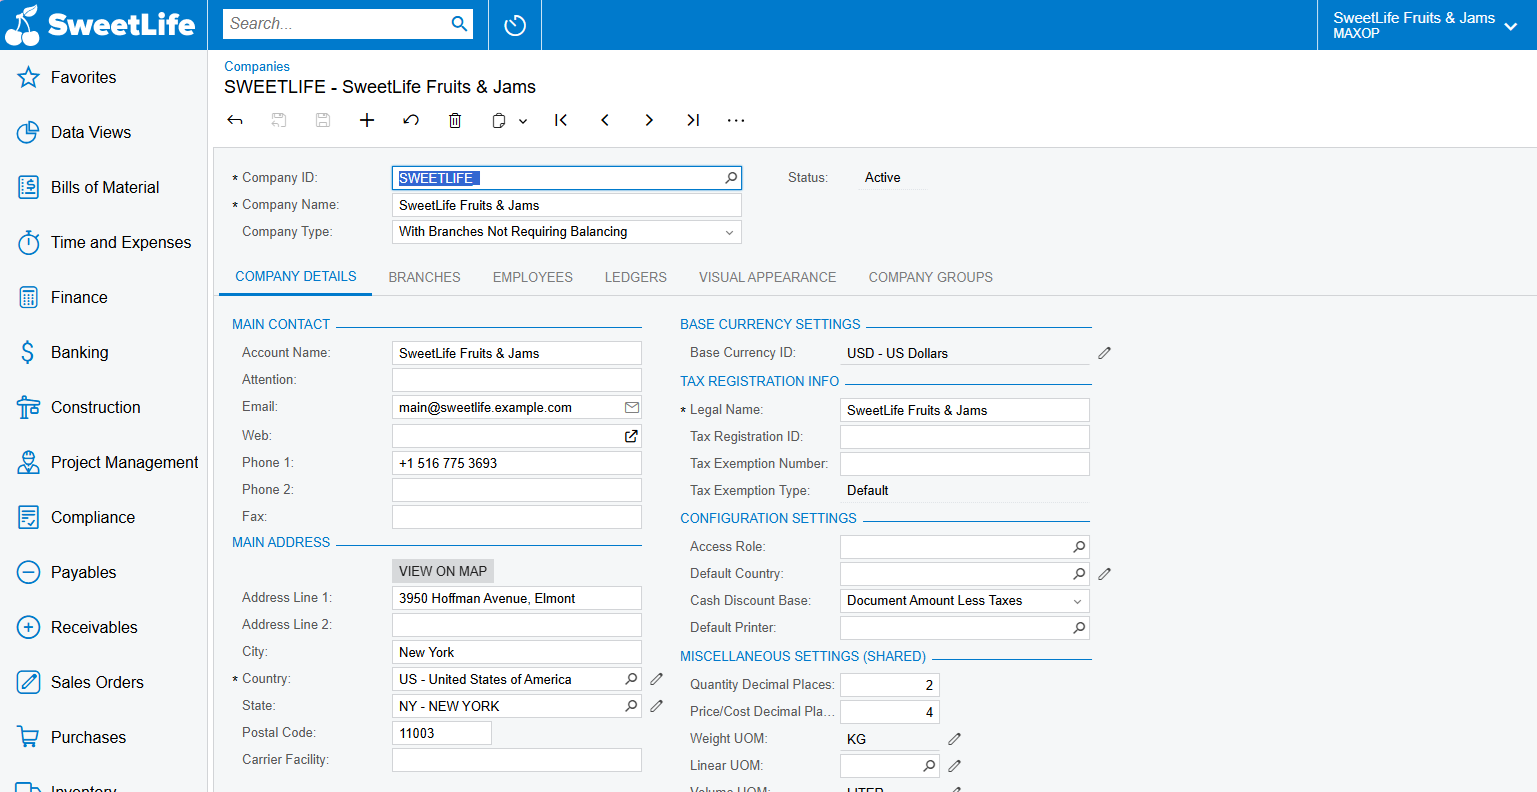
After filling in all the necessary information in each tab, such as employees and GL accounts, your company setup in Acumatica is complete. This ensures that your environment is ready for financial operations.
Once the company is added, you can view and edit the company details at any time you want.
Source: Greytrix – Acumatica Blog
Best Practices for Company Setup
✅ Plan Your Company Structure
Before creating companies, map out your legal entities, divisions, and reporting requirements.
✅ Configure Ledgers First
Set up your ledgers before creating companies to ensure proper financial reporting.
✅ Use Company Groups for Consolidation
For multi-company environments, leverage company groups for reporting and intercompany transactions.
✅ Test in a Sandbox
Always test company setup in a sandbox environment before implementing in production.
Conclusion
📌 Key Takeaway: Acumatica's tenant-based company structure provides a flexible and powerful way to manage multiple legal entities, divisions, and test environments. By following this step-by-step guide, you can ensure your company setup is accurate and ready for financial operations.
🙏 Credits & Acknowledgments
Original Source: This article is based on the blog post "Step by Step Guide for Setting up Companies in Acumatica" by Greytrix.
📅 Originally published: July 15, 2025
📸 All screenshots used in this article are sourced from Greytrix's original blog post and are used for educational purposes with attribution.
About Greytrix: Greytrix is a trusted Acumatica consulting and implementation partner with 25 years of experience. They provide expert knowledge, resources, and best practices for Acumatica ERP implementations. For more information on Acumatica Cloud Services, contact them at [email protected].